Friday 2 October 2020

WINTER IS COMING: THIS IS HOW TO KEEP THE HEAT INSIDE


Winter comes early up here from the Rockies, and you can't start too soon getting ready for the cold, snowy months beforehand. Among the critical factors in maintaining the health of your family and your floors as temperatures plummet is maintaining the internal environment of your house as balanced and stable as possible. Here, we offer a few tips that will assist you stay warm throughout the winter.

1. SEAL LEAKS AND DRAFTS

In the average home, something like 30% of all heat loss happens around windows and doors. Occasionally they are not sealed tightly enough, or perhaps they are not thick enough to hold in the heat. In either case, there are loads of things that you can do to prevent leakage in these regions.

Some difficulty places to see are windows and door frames, outside vents for dryers, baseboards, electrical outlets and boxes, plumbing fixtures, ceiling fixtures, attic hatches, and places where ducts link to outside walls.

Most leaks around windows and doors may be sealed up using caulking (indoors and out), sealant, or weather stripping, and you can use foam gaskets behind light switch and outlet covers to halt the flow of air.
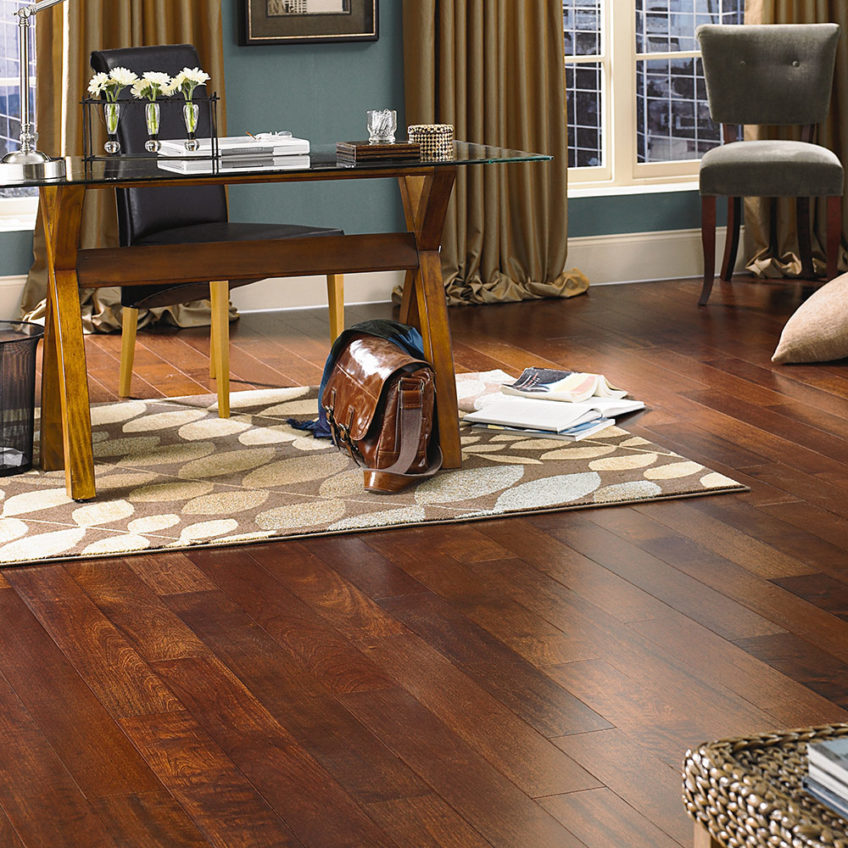
2.INSULATE YOUR WINDOWS

Obviously, not all the heat loss around windows seeps through cracks and gaps. Windows themselves are pretty adequate conductors of heat, relative to your walls that are insulated, and will run the heat in your home right out on the great outdoors.

To combat this effect, a lot of people in cold climates replace screens with storm windows and doors come the fall. These install and uninstall quite easily and can reduce the quantity of heat lost through windows by as much as 50%. A cheaper, albeit a less elegant version of the solution, is to pay the insides of windows with vinyl sheeting (available in any hardware store) that reduces heat transfer.

Layering curtains or finding milder drapery to hang more than windows and glass doors can also help to insulate these vulnerable regions. Don't forget to open the curtains on south-facing windows throughout daylight hours, however, to pull as much of the sunlight's heat (and get too much sunlight for yourself) as possible.

3. MAINTAIN YOUR FIREPLACE

Fireplaces are another heat sucker, frequently draining more warmth from a home when not in use than they supply when in use. If you feel a draft despite the damper closed, then it may be warped, worn out, or rusted and need replacing.

You'll also want to make an appraisal of the fireplace inside and chimney outside. If you notice any bricks from place or open mortar joints, especially inside the fireplace, this is something that you are going to want to get fixed right away. Not only can some heat energy flow out through those areas, but it poses a severe fire hazard. Don't use your fireplace until these things are repaired.

If you find using the fireplace a lot of bother, consider sealing it up entirely. You can do this easily using a stiff piece of something such as cardboard or plywood, or perhaps something with insulation, and using foam sealant to seal it set up. Then simply set a wonderful fireplace screen in front of it and assess the sealant from time to time.

4. REVERSE YOUR CEILING FANS

This is an easy one. Ensure that your ceiling fans are set to turn in a clockwise turning (you can change the rotation on many fans with a change on the foundation ). According to the government's Energy Star program, this will produce an updraft, pushing warm air that has risen to the ceiling back into the room.

5. TAKE CARE OF YOUR HEATING SYSTEM

Hopefully, by now you have run your heater at least once to make certain everything is functioning correctly. Since the temperature drops, getting faulty boilers and boilers repaired takes longer and longer and the distress you need to suffer while waiting gets worse quite quickly.

Before you begin running the heater full time, you will want to replace the air filter, for your wellbeing and to maximize efficacy. Experts also suggest cleaning the unit once a year according to the manufacturer's recommendation. It may even be a fantastic idea to acquire the unit inspected every year or so to make sure it is working at its best and to ensure it is not putting out excesses of carbon monoxide.

Additionally, make sure all your air vents are unblocked and open so that the warm air can circulate throughout your home instead of merely sitting in the air ducts. Speaking of which, you also need to check to be certain those ducts are properly insulated and not only seeping heat to the attic or crawl space on your ceilings and walls.

In case you've got old-fashioned hot water radiators, you are able to boost their heating efficiency by bleeding their valves, releasing any air that might have worked its way inside. As soon as they are up and functioning, consider putting a reflector behind them along with a fan before help disperse the hot air out into the space.

6. MAKE SURE YOU HAVE ADEQUATE INSULATION

Each of the aforementioned is for naught if your home is not well-insulated. If heat is leaking out through the huge surface area of your ceiling, it is going to matter very little how well-sealed your windows and doors are. Therefore, among the most essential things you can do to ready your house for winter is to ensure that the insulation in your attic is thick (the Energy Star program recommends 12 to 15 inches) and is in good repair. Dirty spots in your insulation can indicate air leaks, so have a look about for all these and repair any leaks with low-expansion spray foam made for this function. Ensuring your loft insulation is top notch will also help protect your house against ice dams that could form on the roof, but we will discuss this in a later post.

Similarly, try to make sure that your connected garage, sunroom, as well as other rooms that aren't connected to your central heating system are stored as hot as is reasonably possible, always above freezing. The best thing is to insulate the garage as well as your do the loft. It may be a little bit of an expense at the outset, but it is going to save in the long run.

7. USE HUMIDIFIERS

Cold winter air has a very low capacity of moisture, to start with, but if you pull that air inside and warmth it, the relative humidity may get dangerously low. This may result in respiratory difficulties for your loved ones and unsightly cracks and gaps in your timber. Last monthwe looked at several innovative methods to boost the relative humidity in your house as the air starts to dry. Among the most reliable and consistent ways is to use a loofah. Having a loofah, it is much easier to keep that healthy RH range of 40-60%. And, of course, if you've got a whole house humidifier installed with your heating system, now's the time to clean its components, replace the evaporator pad, and get ready for this sucker to fire up.


Friday 15 May 2020

GRAY HARDWOOD FLOORING: HOW TO PULL IT OFF

What Colors to Use in a Room with Gray Hardwood Floors

If you're looking to add a mixture of warmth, relaxation and a high-quality aesthetic to your home/office environment, grey hardwood flooring is going to do a great job. From blot intensity to colour variations, gray colour on wood floors does not just bring a rare combination of black and white but also supplies you with a broader array of alternatives.

Most interior designers use gray color to create varying visual effects as well as atmospheres. When coupled with different neutral colors, it may also be used to make a peaceful effect making your house feel comfortable and friendly.

Whether you're planning to remodel a formal room or a modern inside, grey is a fantastic bet. But to get the look you intensely desire, you must be in a position to decide on a color combination that will make your gray hardwood floor appealing.

Red for Delight

Adding crimson into the mix combines excitement and play that works better to remove loneliness. It's a better option for modern in addition to minimalist interiors. As an example, you may add a sheet of red furniture like a one or two seater for your living space.

Green for comfort and relaxation

If you're planning to create your rustic-styled interior seem more relaxing, then you may go with a green shade. When it's your bedroom, pay your mattress with a duvet that is green.

Yellow highlights for Pleasure

An addition of yellow to gray wood floors produces a bright feeling essential for minimalist interiors simply because it represents the sun. You can drop some tips on your bed like a green cushion or a small cover on top of a sheet. You might also add a green or two seater in addition to your hardwood flooring to produce your living room look lively.

Blue highlights
Blue is known to be a cool colour, more, stylish and elegant compared to other bright colors such as red. Adding blue to your gray hardwood flooring does not just improve the grey colour but also makes your space feel light and airy. You are able to make your hardwood floors seem far better by installing a couple of blue shelves on the walls of your living room, a few blue Antiques in your corridor walls and more.

Mint green highlights


Another uncommon but a fascinating combination which works well for hardwood floors in minimalistic or modern interiors is mint green on grey hardwood flooring. Just like mint, blue green makes grey wood floors look cooler than every other colour. A good example is coral accents and ceiling beams. You could even enhance the appearance of your hardwood floors by adding a table surrounded by mint green seats and more.
Other surprising mixes


  • White walls on gray hardwood floors -- This combination allows you to bring a colour of your own liking if, red, green or pink.
  • Pale pink walls and grey hardwood flooring -- You can add a pale pink color to your walls to create a exceptional contrast in addition to make your home more welcoming.
  • White on gray wood floors -- Insert some white highlights into your gray hardwood flooring. For example, you may add white chairs around your dining table.
  • The classic mix of black, white and grey -- You just need some few highlights such as white seats round a black table, a white classic in addition to a black counter or a TV stand.

Making your home look attractive begins with how you style your flooring. Gray hardwood floors is only a little hint. Detecting a colour that will work flawlessly fit your grey wood floor seals the bargain. Everything you have to do is, use the way to accomplish the best outcomes.

Floor Sanding Lambeth a hardwood flooring restoration provider offers you not just many different possibilities, but also 100% guarantee that you will receive fulfilled.

For the hardwood flooring on your remodel job hand in hand with

Get in touch with us 020 3151 9075 or utilize our free quotation form.


Tuesday 17 March 2020

Is Wood Worktop Safe For Food?

In deciding whether wood worktops are safe for food, there are two things that ought to be considered. The first is that the end on the wood itself and the second is that the cleaning and maintenance regime which you put in place.

Prior to fitting, so as to make wooden worktops resistant to stains, then they will need to be treated with a protective oil. When deciding upon an oil for your worktops, if you want to prepare food right on the worktop surface, it is vital that you opt for a food-safe oil.

Using a bit of study, you will have the ability to track down official guidelines about the suitability of any product that you want to use together with food preparation. It is really important that you execute appropriate toxicity research prior to applying any petroleum to your worktop when you plan to prepare meals right on the worktop. Nevertheless, as soon as you have completed this research, if you are still in any doubt at all about the suitability of this oil, you should consult your worktop provider that will be able to guide you.

One important issue to bear in mind while oiling your worktop isn't to use olive oil or coconut oil to take care of your wooden worktop. Treating your worktop with these oils is is not a good idea if you're wanting to use your worktop right for food prep. The reason for this is that these oils efficiently"rot" from the wood and cause a build up of bacteria, possibly producing your worktop dangerous for food preparation.

If it comes to routine maintenance and cleanup of your worktop to make it safe for food prep, a frequently oiled (treated with food-safe oil) wood worktop is as simple to wash and maintain as any other worktop. All you need to do is be sure you mop up any spills which occur and may cause bacterial build up. Thereafter, a regular wipe down with a mild detergent will keep your worktop clean and safe.

All that said, if you are using your timber worktop for direct food prep, you want to be really careful not to accidentally damage the surface with knives or other sharp objects.


Thursday 11 October 2018

MAINTAINING YOUR WOOD FLOOR

When buying a home, among those things that you may pay close attention to is your flooring. A flooring has to be beautiful and easy to keep. Wood floors is one the most favored kinds of floors in the united kingdom. You're able to keep hardwood floors in fantastic shape with the support of these tips.

Avoid using difficult or needled brooms.

Use doormats: To maintain the dirt from this space, you want a hefty door mat. This door mat ought to have dirt brushes to remove all of the grit going into the home. The dirt particles sit on the timber and allow it to be black. Vinyl protections will avoid the color fading.

Exposure to sun: A hardwood flooring loses lustre and color through direct exposure to sun. You must choose curtains or blinds which will prevent immediate access to sun rays on the ground. Moving for translucent material will allow adequate light to come in the house.

Water spills: Any water or drink spills should be immediately handled. These can leave a long lasting impact on a wood floor.

Assess your pets: The largest threat floor wood can have is the furry friend. You need to ensure your pet is trained well. Pets frequently scratch the floor when playful.

Friday 28 September 2018

CHOOSING CHERRY FLOORING

Concerning colour and uniqueness, cherry is one of the best materials you can choose for your new hardwood floors. Cherry wood flooring brings an extremely warm character to your home because of the fascinating reddish colour, which makes it the perfect choice for homeowners looking for a stylish yet cheerful ambience in their houses.

However, there's absolutely no need to sacrifice quality and durability for style with cherry wood flooring; it is also a hard, water-repellent, multi-purpose material in addition to being exceptionally attractive to both the eye and the touch.

Here are a few tips to Keep in Mind before purchasing cherry hardwood floors:

Colour -- Decide exactly what colour you would like, and consider which colour will best complement your decor. Pick from bright reds to deep, reddish browns.

Price -- As with other forms of hardwood floors, always shop around online to find the best bargain. Cherry is not as widely accessible as walnut or maple hardwood flooring, so Be Ready to pay a little more for this individual and exclusive material.

Installation -- as a result of minor difficulty involved with installing cherry hardwood floors correctly, it is always suggested to employ a professional to do the job for you.

Friday 13 April 2018

Dustless Sanding and Refinishing


Many homeowners put off refinishing their hardwood floors, simply due to the simple fact they don't want to deal with the mess that follows a traditional full sanding and refinishing. And who could blame them?! Dealing with the residual dust which settles following the floors are finished, sounds like an unwanted headache to many clients- especially the ones that are living in their property.

Dustless floor refinishing is not to be mistaken with sandless flooring refinishing. In fact, sandless floor refinishing isn't exactly sandless either, but we will touch on this in another post!

Our dustless system is an added feature once we do both complete sanding and refinishing or screening and recoating. We utilize our dustless system throughout the whole process of your job- not just during the sanding process.

Dustless flooring refinishing REDUCES the amount of dust generated during a sanding and
refinishing but the procedure is not entirely DUST FREE. Employing the dustless methods drastically lowers the amount of dust by roughly 90%. Here at  Lambeth Floor Sanding we find it imperative to contain that dust for many reasons aside from just the cleanliness factor (although that's high on the standing list)

We constantly use our dustless system if we sand and refinish to our clients; they do not even have to ask for this as a specialization line thing. That is exactly what sets us apart.

Our main reason why we ALWAYS use our dustless system is because we respect and handle every house like our own. It's important for us to make sure we leave your house in pristine condition.